Documentation
- Upload the entire proton_reviews folder to the /wp-content/plugins/ directory.
- Activate the plugin through the ‘Plugins’ menu in WordPress.
- Configure settings as described in this tutorial or follow up on the settings page wizard.
- Create new WordPress page and paste the following shortcode [ proton-reviews ]
- Link to the created page anywhere from your websites template, pages or posts.
Show in full screen view? – Decide whether or not to show proton reviews panel in full screen (over your websites layout) or embedded in the layout of your website. Recommended setting is Yes (show in full screen) as it increases chances of user interaction and makes it easier.
Display reviews as list or tabs? – You can showcase your reviews in two different layouts:
a) list where reviews are displayed in continues unobstructed list or
b) tabs where reviews display is tabbed according to the source of the review.
Abbreviate reviewer last name? – You can choose to abbreviate reviewer name which may be a needed option if you are showcasing reviews on the websites that need to be HIPAA compliant.
Minimum star rating: Enter minimum star rating value from 1 to 5 for the reviews you wish to be displayed.

Company Name – Enter the name of your business which you want to be displayed if you leave it blank Site Title will be displayed instead.
Company Logo – Upload your logo image. Make sure you are uploading logo of correct size, which is whatever works best for you we recommend logo size of about 200px in width or height.
Company Email – Enter email you wish to link negative review form to.

Please click here to get reCAPTCHA settings. reCAPTCHA is needed to protect you from the spam. This plugin has one simple form which allows unsatisfied customer to contact you first. You will need to obtain reCAPTCHA Site Key and reCAPTCHA Secret Key in order to protect this form from spam. Please make sure you choose Recaptcha V3 as your choice of the type of reCAPTCHA

Display Google Reviews? – Choose whether or not to show your business reviews from the Google Places.
Multiple Google Places? – Choose whether to show google reviews from multiple business locations. You can showcase reviews from up to 9 Google Places.
Google Maps Location ID’s – You will need to enter google map location ID for each Google place you wish to obtain reviews from and to which you wish to direct your website visitors to leave a review for you. You can get your Google Maps Location ID’s here. Just type your business name in the input field on the linked form.

Display Yelp reviews? – Choose whether or not to show your business reviews from the Yelp.
Yelp Businesses ID – You can find Yelp Businesses ID as part of your Yelp listing URL: https://www.yelp.com/biz/your-yelp-business-id (for example https://www.yelp.com/biz/ocean-eye-optometry-summerville)

Display Facebook reviews? – Choose whether or not to show your business reviews from your Facebook page.
Facebook App ID and Facebook App Secret – To acquire Facebook App ID and Facebook App Secret you will need to create Facebook App first. You can create Facebook App here. Make sure you add Facebook Login to App Products and set redirection url to https://your -websites-domain/wp-admin/options-general.php?page=proton . Note that you will need to have HTTPS (SSL) on your WordPress administration area in order to connect to Facebook to fetch your page reviews. Also please note that you must not make your app live in order for this to work correctly. It’s really is really simple step setup and you should be able to all this in just 2 minutes.
-
- Click on green “Create App” button..

- In the popup screen that opens choose the last option “Other” and click next to continue.

- Please select ‘Bussines’ as an app type

- Click on green “Create App” button..
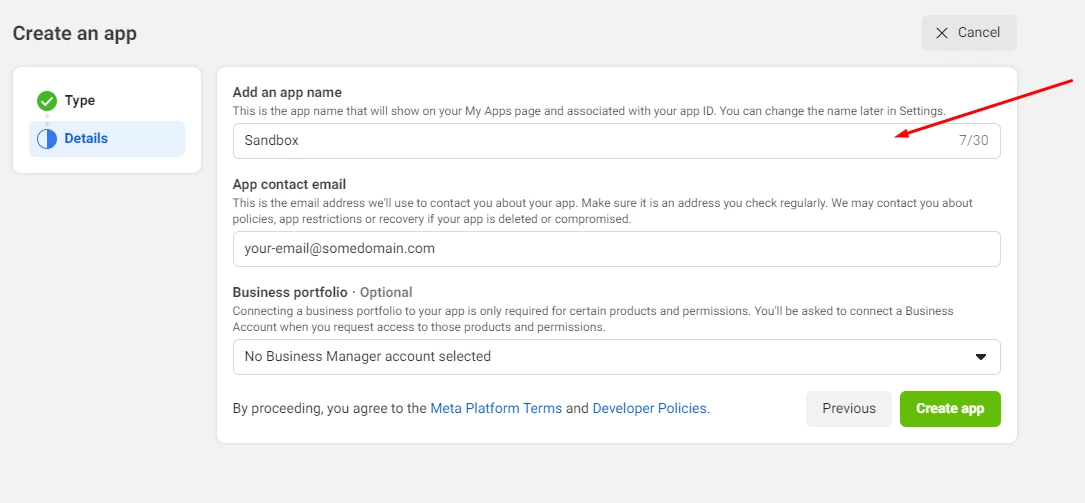
- Enter App Display Name and click Create App
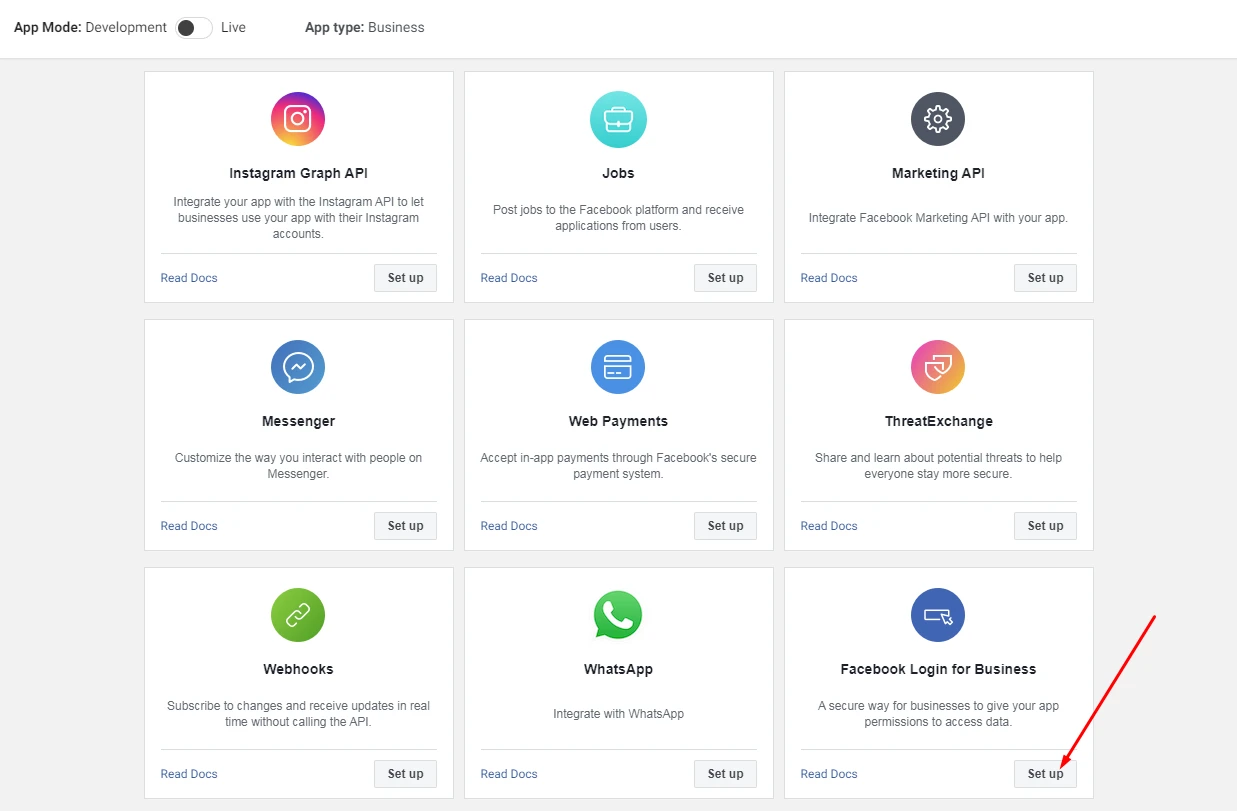
- On the Add a Product page click the “Set Up” button under the ‘Facebook Login for Bussines’ product.
- Then enter in a Valid OAuth Redirect URIs redirection url relative to your website for ex. https://your-websites-domain/wp-admin/options-general.php?page=proton and allowed domains
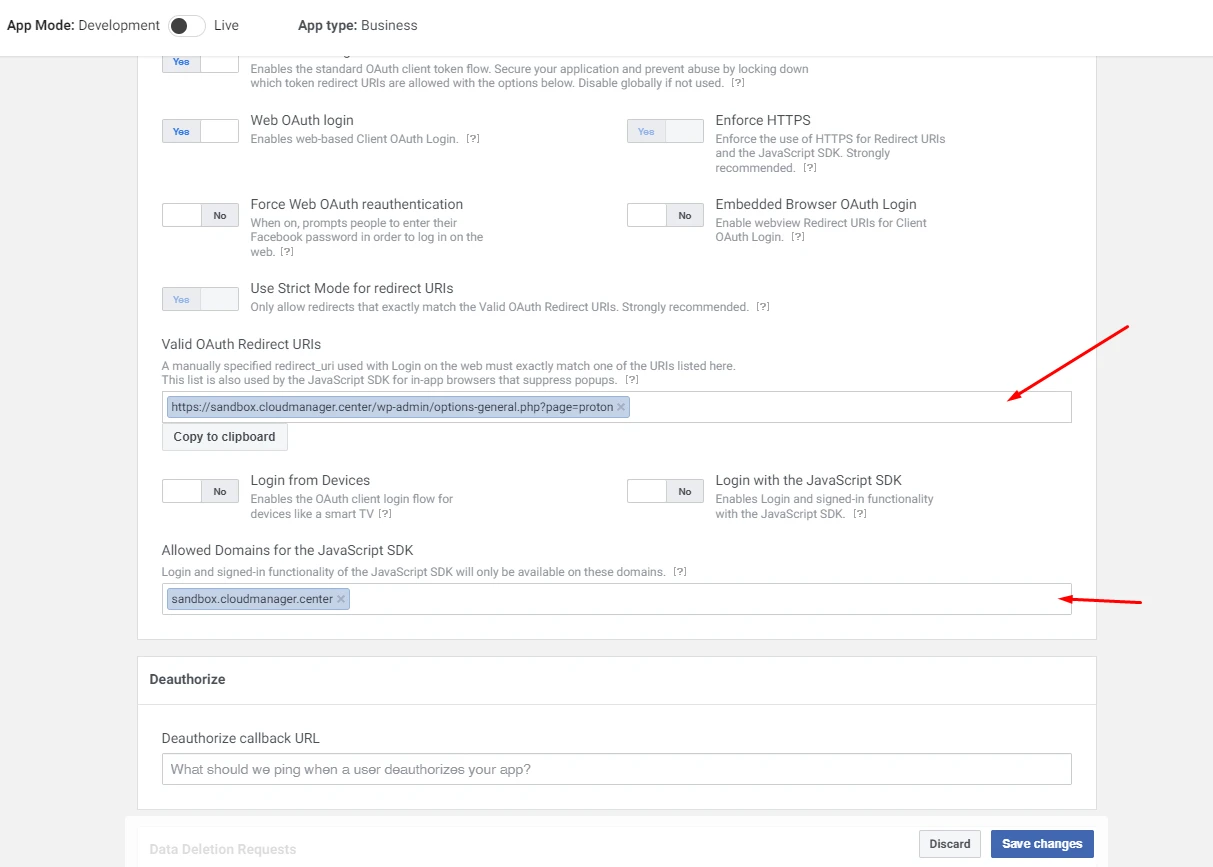
- Once you have entered redirection URL just click on Save Changes on the bottom right of your screen.
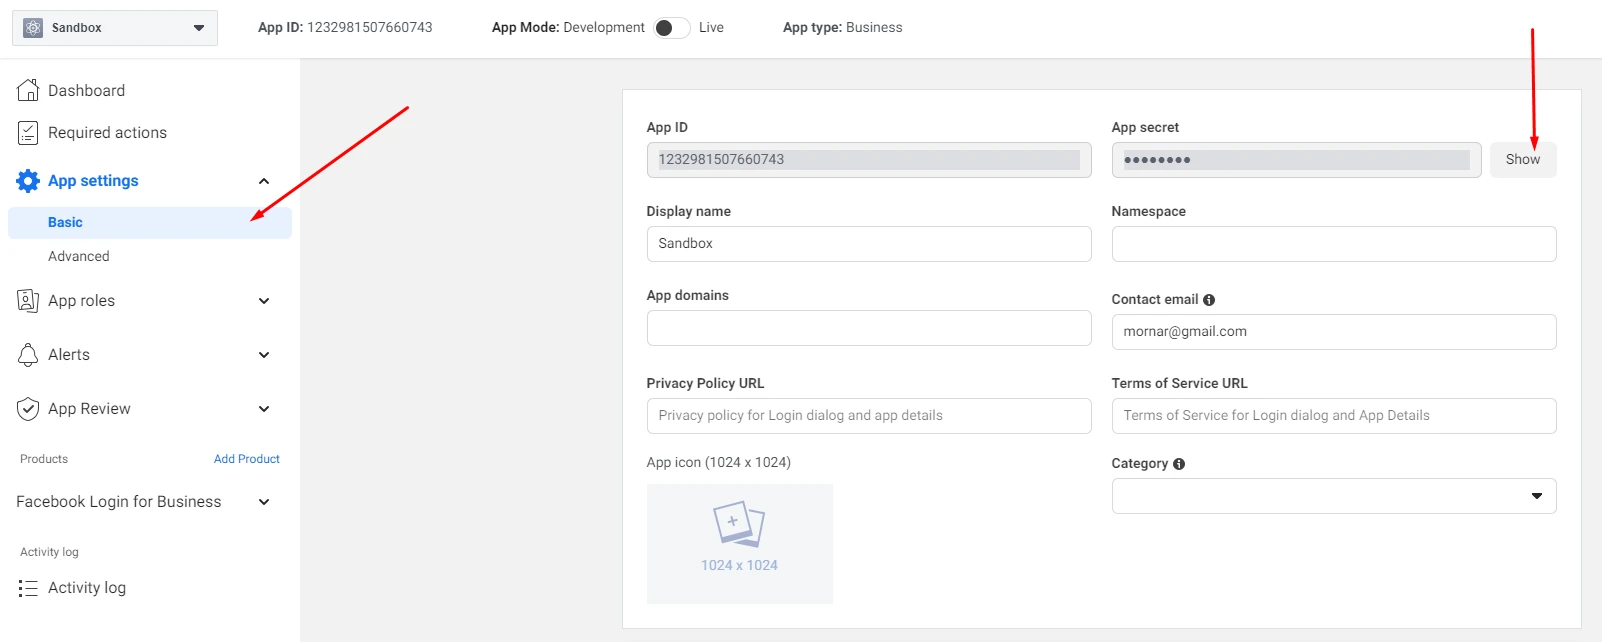
- Next navigate to Dashboard >>App Settings >> Basic, this is where you will get your App ID and App Secret keys. ( You may be prompted to enter your Facebook password when you click the “Show” button under the App Secret Key. )
This is all you will need to set up the Facebook app correctly. Please mind a few important notes.
- In order to connect to Facebook and fetch Facebook reviews your website administration will need to be on SSL (https)
- You must not publish the app or you will not be able to fetch Facebook reviews( it needs to stay in development mode)
- You must save plugin settings once you enter the App Secret and App ID keys before you can click the Continue with Facebook button. (in case you are following the setup wizard just click next after you have entered the App ID and Secret Key of your FB app).
Get Facebook Reviews – After you have entered your Facebook App ID and Facebook App Secret you can connect to Facebook simply by clicking on “Continue with Facebook” plugin. (Unless you are following the setup wizard then you should just skip this step)
Once you are finished connecting to Facebook you will be redirected back to the plugin settings page. Now in the place of the button, you will see the dropdown input field with all of the Facebook pages you have admin access to, and then just choose the page you wish to fetch the reviews from.

Please drag and drop to reorder front end review screens. Front end review screens will prompt user to leave the review either on Google Places, Yelp or your Facebook page in order you choose here.

Requires PHP 7.3+ and allow_url_fopen enabled.